Leave meassge
Talk to an Expert
Familiarizing yourself with the wiring methods of different types of photocontrols helps you accurately install and configure them.
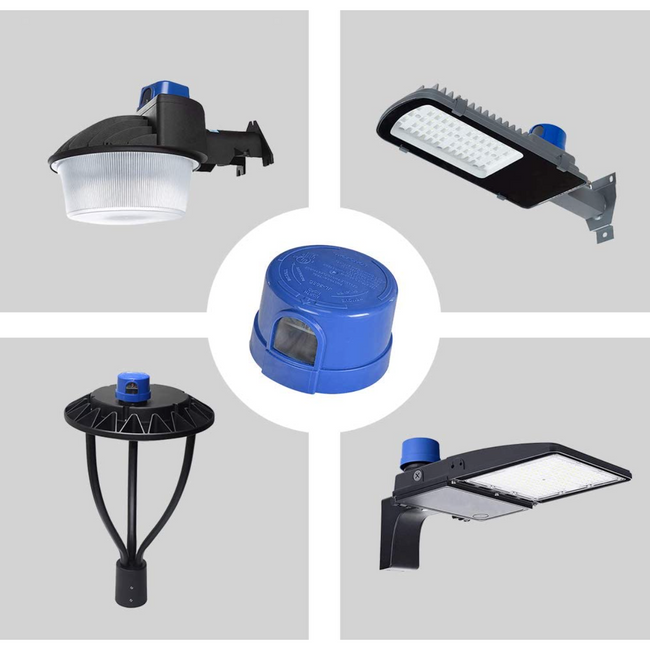
The ANSI C136.10 NEMA 3P Socket and photocontrols are widely used in street lighting, parking lots, industrial areas, commercial building exteriors, scenic spots, parks, sports stadiums, and other outdoor lighting locations.


NEMA 3P Socket Wire color codes:
Black – Live White – Neutral Red – Load
The ANSI C136.41 NEMA 5P/7P Socket is primarily used in smart street lighting systems, supporting additional functions for photocontrols such as time scheduling, dimming control, and remote monitoring. These sockets provide higher control flexibility and intelligent functionality, and are widely used in smart street lighting, industrial and commercial areas, public spaces, smart infrastructure, sports venues, parking lots, and more. They ensure greater flexibility, efficiency, and energy savings in various smart lighting systems, meeting the needs of complex applications.


NEMA 7P Socket Wire color codes:
Three Main Wires: Black – Live White – Neutral Red – Load
Four Dimming Wires: Brown Wire/Orange Wires–Dali Dimming Pink Wire/Violet Wire–0-10V Dimming
Wire-in photocontrols are widely used in various lighting applications in daily life, such as porch lights, chicken coops, stables, and barn lights. They automatically detect changes in ambient light and intelligently control the switching of lights, enhancing convenience while saving energy. Whether it’s the welcoming light at your doorstep or lighting needs on the farm, wired photocontrols provide an intelligent, comfortable, and efficient lighting experience for your everyday life

3-Wire Light Controller wire color codes:
Black – Live White – Neutral Red – Load
Some customers incorporate terminals at the end of the photocell to enjoy the following benefits:
1. Ease of Installation: Terminals simplify the installation process, making wiring clearer and more convenient. They allow quick wire fixation, avoiding issues with soldering or direct insertion into connection ports.
2. Improved Safety: Terminals help ensure a secure wire connection, preventing electrical faults due to poor contact or loosening, thus reducing safety risks.
3. Ease of Maintenance and Replacement: Adding terminals makes the maintenance and replacement of the photocell easier. The terminals can be simply reconnected without the need to dismantle other components.
4. Compatibility with Different Wiring Methods: Terminals are compatible with various wire types and specifications, offering more flexibility in connection methods.
5. Enhanced Durability: Terminal connections improve the long-term stability of the device, reducing failures caused by loose cables or poor contact, and extending the photocell’s lifespan.


3-Wire Light Controller wire color codes:
Black – Live White – Neutral Red – Load
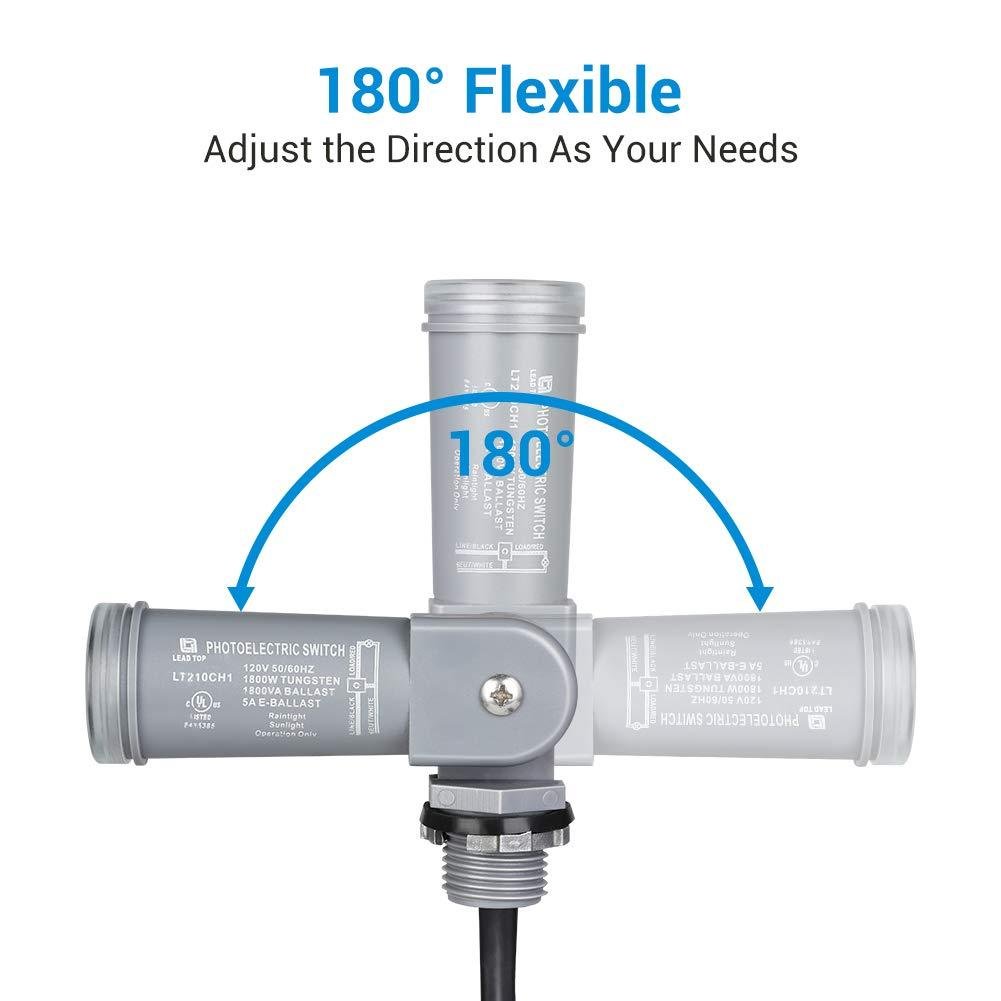
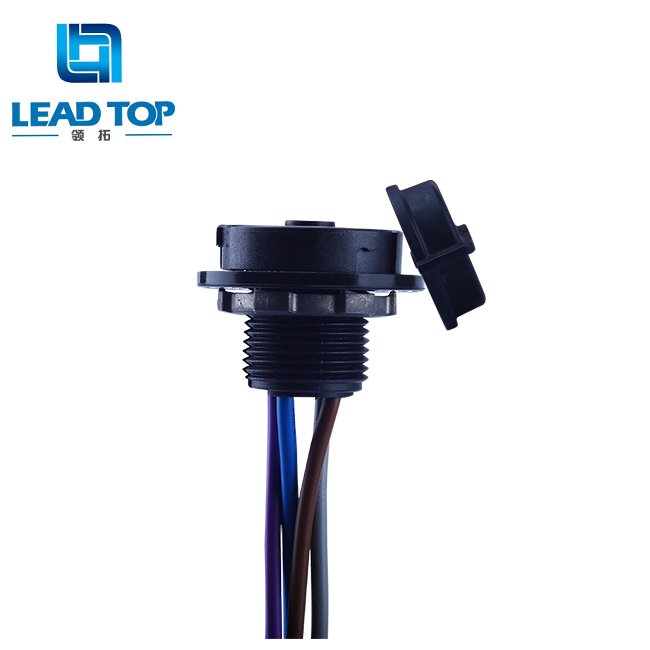
The design of the split-type photocontrol enhances installation flexibility by allowing the sensor head and photocontrol body to be separated, enabling the optimal installation position to be chosen based on specific needs.


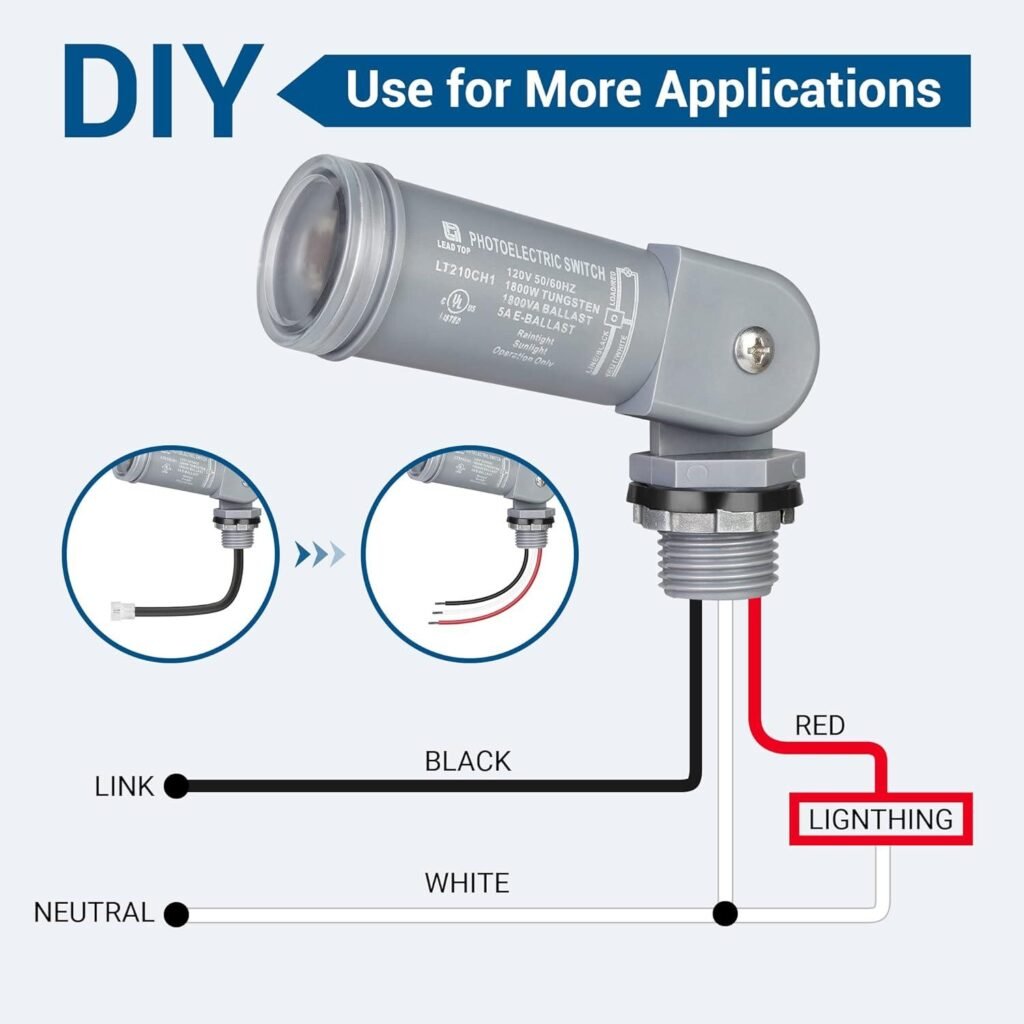
3-Wire Light Controller wire color codes:
Black – Live White – Neutral Red – Load
Wall-mounted photocontrols are specifically designed for wall installation applications, particularly suitable for porch lights and other outdoor lighting systems. By mounting the photocontrol on the wall, it ensures more stable and convenient operation, efficiently activating the automatic light adjustment function, and enhancing lighting management and energy efficiency in residential or commercial spaces.


3-Wire Light Controller wire color codes:
Black – Live White – Neutral Red – Load
The eye-type photocontrols are primarily used in home lighting systems, designed to work with various household bulb types, providing convenience for daily life. Our eye-type photocontrols come in two main styles: spring-type photocontrols and twist-lock photocontrols.
The spring-type photocontrol can be flexibly adjusted in direction and orientation based on ambient light levels, offering a 360° range of adjustment to ensure optimal light control. The twist-lock photocontrol, on the other hand, is known for its sturdy design and easy installation, making it suitable for a variety of household lighting applications.
Whether for porch lights, garage lights, or other daily lighting needs, eye-type photocontrols automatically sense changes in light and intelligently control the switching of lights, enhancing the intelligence and energy efficiency of home lighting.


E26/E27 Screw-in Type
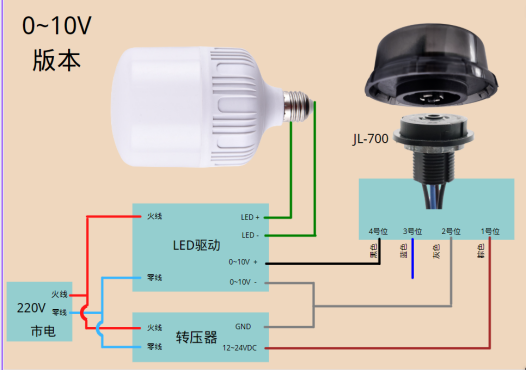
The installation method of Zhaga sockets is indeed different from that of NEMA sockets. Zhaga sockets are connected in parallel with the lamp’s power circuit, linking the photocontrol to the lighting circuit to achieve automatic light control. This method simplifies the installation process, as it does not require complex modifications or alterations to the lamp’s circuitry.

Talk to an Expert
1.Choose the right photocontrol: Ensure that the rated voltage, current, and power of the selected photocontrol match the requirements of your lighting system to avoid failures or safety issues.
2.Installation location: The sensor head of the photocontrol should be exposed to natural light as much as possible and should not be obstructed, ensuring accurate light sensing. For outdoor installations, make sure the photocontrol is waterproof and dustproof to withstand environmental conditions.
3.Correct wiring: Follow the wiring diagram of the photocontrol carefully, ensuring secure connections and avoiding poor contact or incorrect wiring.
4.Check grounding: Ensure the proper grounding of both the photocontrol and the light fixture to avoid electrical faults or safety hazards due to improper grounding.
5.Avoid short circuits: During installation, avoid short-circuiting the photocontrol’s terminals with other cables or metal parts to ensure safe operation of the circuit.
6.Power shutdown: Always turn off the power supply during installation or maintenance to prevent electrical shock or equipment damage.
7.Environmental compatibility: Select a photocontrol suitable for the installation environment, taking into account temperature, humidity, and other factors to ensure long-term stable operation.
8.Regular inspection and maintenance: After installation, regularly check the photocontrol to ensure it is functioning correctly, with sensitive light sensing and stable operation.

lead top
Typically replies within minutes
👋 Thanks for contacting Lead-Top! Any questions related to Comprehensive Guide to Various Photocell Wiring Diagram?
WhatsApp Us
Online | Privacy policy
WhatsApp us
Stay Informed with Exclusive Updates.
“To receive light control market trends, industry news, and new product releases.”